Kasa Smart Plugs: Your Ultimate Guide to Setup and Troubleshooting
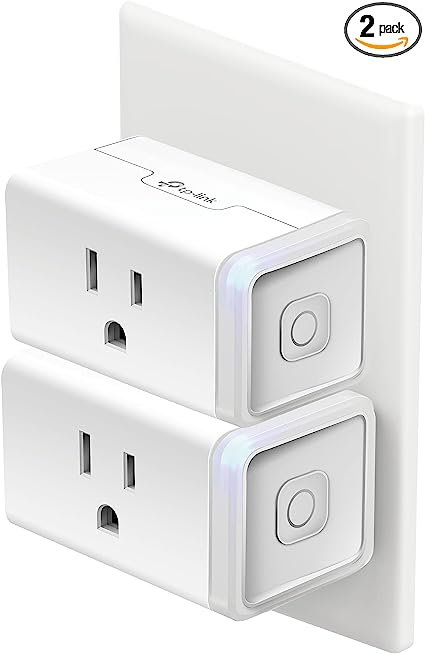
In the realm of TP-Link smart home products, Kasa smart plugs have emerged as a true favorite among consumers. These nifty devices offer the convenience of controlling and scheduling the power supply to your devices. However, to harness their potential, it's crucial to set up your Kasa smart plug on your network and link it to your Kasa cloud account. Once this connection is established, you gain the ability to manage the plug remotely, as long as it remains online.
BUY @ AMAZON $13.99
Connecting Your Kasa Smart Plug
The process of connecting your Kasa smart plug begins with ensuring you have a stable internet connection and a mobile device equipped with the Kasa app. The smart plug should also be set to pairing mode. This mode facilitates the synchronization between your device and the plug, ensuring a seamless connection.
PEOPLE ALSO READ:
Microsoft to acquire video game publisher Activision Blizzard for $68.7 billion
Google to launch new AI-powered contact lenses that can measure glucose levels in tears
Best solar wireless security cameras
BUY @ AMAZON $13.99
Kasa Smart Plug Setup in Detail
Initiating the pairing process requires your mobile device to be connected to the same 2.4 GHz Wi-Fi network that your Kasa smart plug will join. After downloading and installing the Kasa Smart app, you need to register your account. With these initial steps completed, power up your smart plug and use the app to integrate it into your network.
It's worth noting that Kasa smart devices are exclusively compatible with the 2.4 GHz Wi-Fi frequency band. Consequently, it's essential to verify that your network settings are configured accordingly.
Optimizing Your Network for Kasa Smart Plug
For a smoother experience, consider turning off the 5 GHz option while setting up if your router offers both 2.4 GHz and 5 GHz on the same SSID. Alternatively, you can opt to create distinct networks, each with its special name and password, giving your setup a personal touch. This segregation ensures that the 2.4 GHz network is used exclusively for connecting smart devices.
Additionally, take a moment to disable any VPN and ad guard software on your mobile device. These tools can obscure your device's IP address, potentially hindering its ability to discover new devices on your network.
BUY @ AMAZON $13.99
App Installation and Configuration
Downloading the Kasa Smart app from your respective app store (Android or iOS) is the next step. Upon installation, proceed to establish a cloud account. Completing this setup involves account verification and accepting the terms and conditions. For optimal performance, enable both location services and Bluetooth on your devices, granting the necessary permissions when prompted.
With your network environment meeting the prerequisites, the process of adding any Kasa device becomes remarkably straightforward. Here's a comprehensive guide to adding your Kasa smart plug to your network.
BUY @ AMAZON $13.99
Seamless Integration with Your Wi-Fi Network
Prior to commencing the setup process, ensure your smart plug is connected to a functional power outlet and observe its status LED blinking in alternating orange and blue. This indicator confirms that the plug is in pairing mode. Should this not be the case, press and hold the reset button for 5 to 10 seconds to initiate a reset and enter pairing mode.
1. Open the Kasa app.
2. Tap "Add Device" or the + icon at the top right corner to initiate device addition.
3. Select your device type, then navigate to the Smart Plugs category.
4. Choose your specific smart plug model (e.g., HS100, HS110).
5. Confirm the flashing orange and blue LED indicator, then tap "Next."
6. Access your phone's settings to connect to the plug's hotspot, identified with the prefix "TP-Link...". Re-enter the Kasa app once connected.
7. Select your Wi-Fi network, opt for the 2.4 GHz frequency, and enter the correct password. Tap "Join."
8. Personalize your device by assigning it a name and selecting an icon from the available options.
9. Congratulations! Your smart plug is now successfully integrated into the Kasa app.
Troubleshooting Kasa Smart Plug Connectivity Issues
Despite the straightforward setup process, connectivity hiccups can occur. Kasa smart plugs are designed to connect to a 2.4 GHz Wi-Fi network, so if you're using a 5 GHz network, connection attempts may fail. Disable any VPN and ensure your device is on the same Wi-Fi network for successful pairing. Additionally, proximity to the router enhances signal strength during the pairing process.
Addressing connectivity challenges requires a systematic approach. Here's a checklist to help you identify and rectify potential issues:
- **Stable Wi-Fi Network:** Ensure your Wi-Fi network isn't overcrowded, and use the correct password when connecting the smart plug.
- **Frequency Band Selection:** Connect exclusively to the 2.4 GHz frequency band, temporarily turning off the 5 GHz band.
- **Proximity:** If you're setting up an outdoor plug, ensure it receives a robust network signal.
- **Network Consistency:** Ensure your phone is connected to the same network, with Bluetooth enabled. Disable any virtual private network (VPN) or adblocker.
- **Resetting the Plug:** If all else fails, try resetting the smart plug to eliminate software glitches.
- **Restart Devices:** Restart the smart plug, Wi-Fi router, and your phone. Power cycling the router can help resolve connectivity issues.
After completing these steps, reattempt the setup process using the previously outlined instructions.


Post a Comment